Need to paint your concrete floor? Considering the best floor coating for your situation?
While we don’t advocate for floor paint due to its poor durability, it can be a cheap option for property owners looking for a super inexpensive, DIY concrete coating to spruce up a space.
This step-by-step professional guide covers the basics of painting your concrete floor: from preparing the surface and gathering tools to applying primer and paint. However, if you’re looking for something that will truly last, it’s time to consider a polyaspartic coating.
Getting Started: Tools and Materials Needed
Before starting the floor painting process, gather all the necessary tools and materials–you don’t want to be running out in the middle of your project. That includes paint, primer, concrete cleaner, etching solution (sometimes), caulk, your pressure washer, vacuum, roller, brush, and paint stripper (sometimes).
Safety should never be an afterthought. Wear gloves, a mask or respirator in small spaces, and safety glasses to protect against dust, debris, and fumes. The right shoes and gloves are necessary when removing tack strips or handling hazardous materials.
Once you have these tools and safety gear, it’s time to begin preparing concrete for painting.
Preparing the Concrete Surface
Preparation is the foundation of any successful concrete coating project – the same for floor painting!
A well-prepared surface ensures the longevity and durability of your paint job. If you don’t prep the surface properly, the paint simply won’t last. We’ve seen examples of concrete floor paint chipping within weeks when the surface isn’t prepared well.
Before starting the painting process, remove any old chipping or flaking paint. This can be done using chemical strippers or traditional tools like wire brushes and paint scrapers, for a clean surface that allows for optimal adhesion of new paint or sealers.
Preparation involves three steps: cleaning the floor, repairing cracks and holes, and (sometimes) etching the surface.
Cleaning the Floor
Thoroughly clean your concrete floors by sweeping and vacuuming to remove dust and surface debris. Use a pressure washer or vacuum for a deeper cleaning to remove stubborn dirt and grime.
Some people will recommend a concrete cleaner before painting. Pay special attention to grease stains and trapped moisture, which can affect paint durability. Make sure the floor is 100, completely, and absolutely dry to avoid issues like mold or bubbling paint in the long-run.
Repairing Cracks and Holes
After cleaning, repair any cracks, pits, or holes. Sweep the room to clear debris from the cracks. Fill the cracks and holes with fast-setting hydraulic cement or silicone caulk. Hydraulic cement is effective because it creates a watertight seal quickly. A concrete filler with silicone caulk offers added flexibility.
Smooth out any protruding materials after filling the cracks to ensure a uniform surface. An even surface will help enhance the final appearance of your painted floor and to prevent uneven wear over time.
Etching the Surface
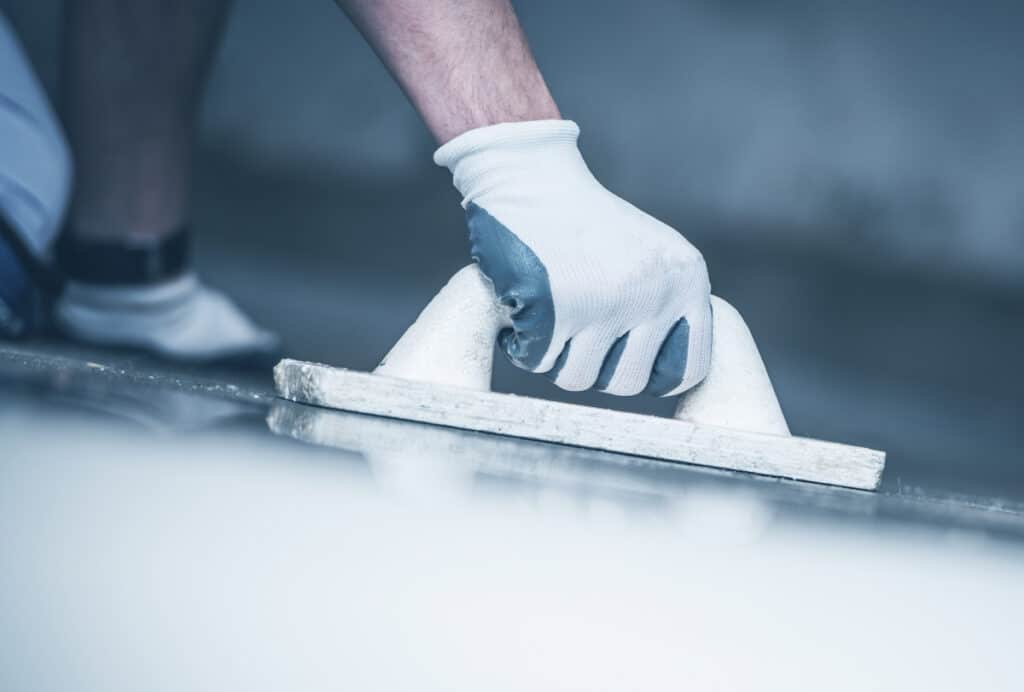
Etching the concrete surface involves using tools or an etching solution to create a rough texture that helps the paint adhere better. While this is less important for concrete paint, it can be beneficial for thicker coatings like polyaspartic or epoxy.
At Everlast, we use diamond grinders to achieve the best surface for product bonding.
Priming the Concrete Floor
Priming enhances the bond between the concrete and paint, preventing peeling and chipping. To protect the surface from moisture damage and ensure the paint adheres well and lasts longer, make sure the concrete is completely dry before you apply a concrete sealer to avoid interference with its effectiveness.
Choosing the Right Primer
Concrete primers include water-based and solvent-based options, each suited for different applications. The moisture content of your concrete slab affects adhesion, so consider this when choosing a primer. Using paint specifically formulated for concrete.
All-in-one paint and primer options simplify the process by eliminating the need for a separate priming step. A high-quality masonry bonding primer, too, ensures proper adhesion and durability of the paint.
Applying the Primer
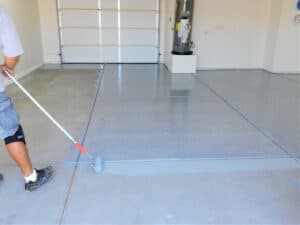
Start from the furthest corner of the room and work towards the door to avoid stepping on your freshly applied primer. Use a paintbrush roller for even application, and a roller with an extended arm for larger areas. A microfiber roller with a 5/16” nap size is ideal for even primer application.Spread the primer evenly to maintain consistent thickness.
Fill small gaps or voids during primer application for a smoother finish. Painter’s tape helps achieve clean lines along baseboards during priming and painting.
Painting the Concrete Floor
After applying the primer and letting it dry thoroughly, you can start painting.
Selecting Concrete Floor Paint
When selecting paint for interior concrete, choose a product specifically formulated for concrete. We recommend polyurethane concrete floor paints for their durability and ease of application. For outdoor concrete surfaces, choose paint specifically designed for outdoor use to withstand the elements.
Polyurethane paints offer damage resistance and long-lasting protection, making them a popular choice. All-in-one paint and primer can simplify the process by removing the need for a separate primer coat.
Consider features like fast-drying and non-slip finishes when selecting your concrete floor paint.
Cutting In Edges and Corners
Cleanly painting edges and corners—professionals call this “cutting in”—is mandatory if you want a neat and professional-looking finish. Use painter’s tape to protect edges and corners, and begin with a brush to carefully paint edges and corners for precision. This helps get edges well-covered and prevents paint from bleeding onto adjacent surfaces.
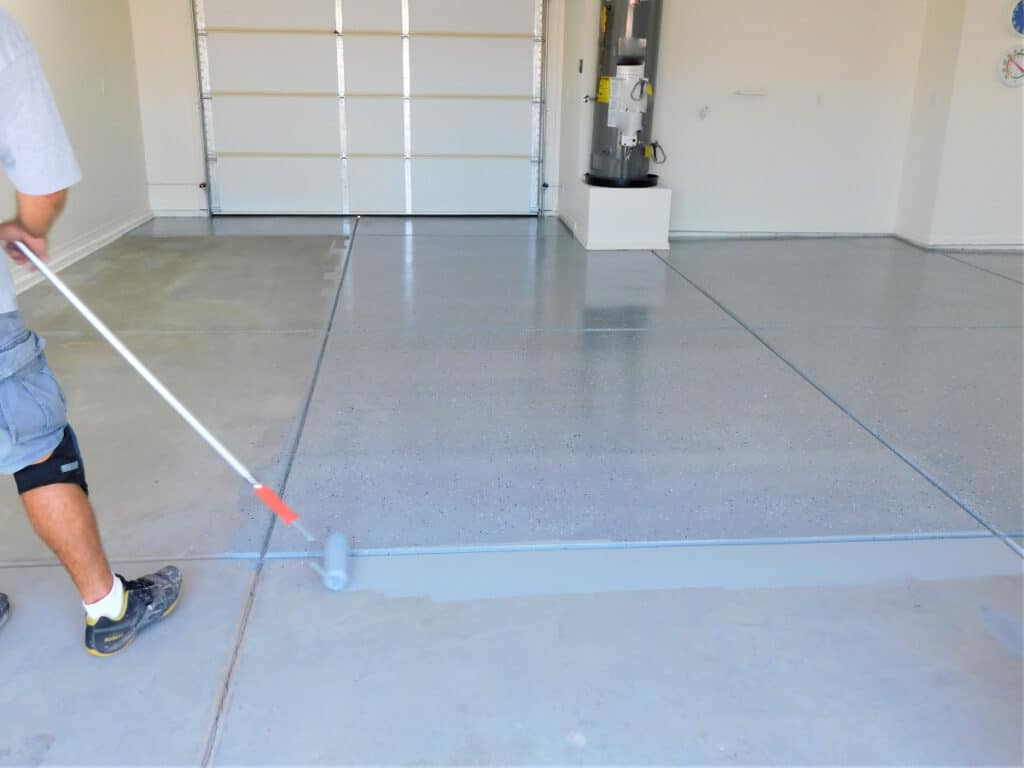
Rolling on the Paint
Work in sections and allow sufficient drying time between coats for an even finish. Start from one corner and work your way out to avoid stepping on wet paint. Wait for the recommended drying time between coats for a finer adhesion and finish.
Inspect the painted surface for imperfections after the final coat and touch up as needed with a brush.
Painting Techniques and Strategies
When it comes to painting a concrete floor, employing the right techniques and strategies can make all the difference in achieving a professional-looking finish. Here are some tips:
- Work in sections: Divide your concrete floor into smaller, manageable sections. Completing each section one at a time helps maintain even coverage and prevents drips.
- Use a “W” or “M” pattern: When using a roller, apply the paint in a “W” or “M” pattern. This technique helps prevent streaks to give your concrete floor a uniform appearance.
- Cut in carefully: Use a paintbrush to cut in along the edges and corners of the room where the roller can’t reach well.
- Apply thin coats: Apply thin coats of paint, allowing each coat to dry completely before applying the next one. This approach helps prevent drips and uneven coverage, resulting in a more durable and attractive finish.
- Use a high-quality roller: A good roller and brushes are often overlooked. Don’t cheap out, invest in a high-quality roller with the appropriate nap length for your floor type and desired finish.
Safety Precautions and Best Practices
- Wear the right protective gear: Always wear protective gear, such as gloves, safety glasses, and even a mask, to shield yourself from paint fumes and splatters. This is especially important when working with concrete paint, which can be more hazardous than regular paint.
- Ventilate the area: Ensure good ventilation by opening windows and doors. Proper airflow prevents the buildup of paint fumes.
- Use a drop cloth: Protect surrounding areas from paint spills and splatters by using a drop cloth.
- Follow manufacturer instructions: Follow the manufacturer’s instructions for the paint and any other products you’re using.
- Test the paint: Before applying paint to the entire floor, test it on a small, inconspicuous area. This helps you make sure the color and finish meet your expectations and that the paint sticks well to the concrete surface.
Benefits of Hiring Professionals to Paint Concrete Floors
Before painting a concrete floor by yourself, carefully consider the pros and cons.
Homeowners often underestimate the complexity of painting concrete surfaces well, particularly the preparation element. Professionals have the expertise and equipment to get the job done right, and done quickly.
While DIY might seem cost-effective, professional floor coating companies like us provide more durable solutions! Trust us! We’ve seen enough failed epoxies and concrete paint to know!
Everlast Concrete Coatings, based in the Finger Lakes region of New York State, specializes in polyaspartic concrete coatings. These coatings offer far superior protection against tire wear, foot traffic, moisture, temperature changes, and UV rays – no fading and no discoloration.
Investing in professional coating services can save time and money in the long run by ensuring a high-quality, long-lasting finish. Get in touch with us today for a free, no-obligation quote.