Quick Takeaways
- Most standard two-car garage floor coatings are completed in just one day.
- Expect loud surface prep in the morning as the concrete floor gets ground and cleaned.
- The coated garage floor is ready for light foot traffic the next day, but wait 2–3 days before parking a vehicle or moving heavy stuff like tool chests or fridges.
What A Concrete Coating Day Looks Like
1. Prepping Your Garage for Floor Coating
Before anything gets coated, the space gets protected. We lay down plastic sheets in front of the overhead doors and cover anything inside the garage that shouldn’t get dusty. This step helps prevent any flakes or dust from settling on your driveway or personal items. It’s a smart way to start any garage floor coating project: clean, careful, and ready to go.
That first round of preparation sets the tone for the entire job. It’s something we never skip, and homeowners appreciate the extra care we take.
2. Proper Preparation: Grinding, Crack Repairs, and Surface Prep
The first part of the install is the loudest.
Diamond grinders take to your concrete surface to rough it up just enough so the coating has something to grab onto. We also repair cracks and small imperfections using fast-curing polyurea crack filler. This surface prep work is essential, not just for durability, but to make the finished floor look seamless. One customer told us afterward they had no idea their floor had that many cracks before we coated it. You wouldn’t know by looking at it now!
Proper surface preparation makes a big difference in the final result, especially when dealing with moisture-prone garage floors or older concrete slabs.
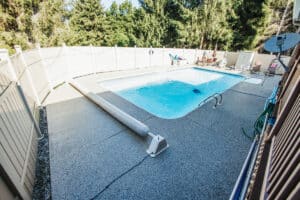
3. Rolling On the Base Coat and Full Flake Broadcast
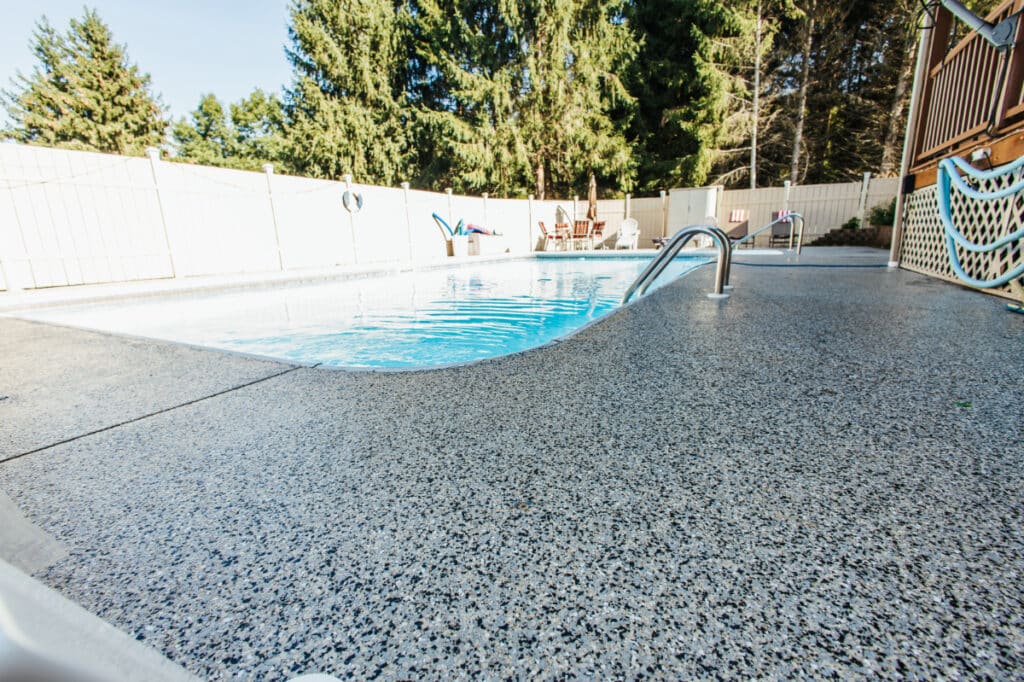
With the surface smooth and clean, we roll on a polyurea base coat (sort of like epoxy primer). We use large rollers and brush the edges to keep this first coat clean along the walls. Before the coating sets, we toss on decorative flakes (also called decorative chips) by hand. And we don’t hold back, we go full broadcast, covering the entire surface with chips. This isn’t some light sprinkle.
The flakes add texture, help with traction, and give the coating its finished look. It’s one of the biggest upgrades over a basic garage floor paint job or low-cost epoxy floor paint from home improvement stores. If there’s one thing we can recommend, it’s skip the DIY project and hire a professional concrete coating company.
4. Flake Scraping and Clean-Up
After about an hour and a half, that base coat is dry enough to walk on.
At that point, we scrape the entire surface with wide metal blades. This knocks down sharp flakes and removes any loose ones. Then we vacuum the whole garage, edge to edge. It’s a step that makes the floor feel even underfoot, and it’s one of the reasons our floors look finished and polished, not bumpy or gritty like a DIY garage floor coating often ends up.
5. Applying the Polyaspartic Clear Coat
The last step is sealing everything in. We pour out the polyaspartic topcoat and use a squeegee to spread it, then go over it again with a roller to even everything out.
This topcoat is where the real magic happens. It’s UV stable, resistant to hot tire pick up, and incredibly durable. Compared to garage floor paint or epoxy floor coatings, it cures faster, holds up longer, and handles heat and chemicals with ease. Polyurea also flexes with the concrete, which helps prevent peeling and delamination over time.
6. When Can You Use Your Garage Again?
- Walking on the floor: The next day it will be completely dry (in warm weather).
- Bringing on heavy items like toolboxes or fridges: Wait 48 hours.
- Parking your car: Give it 2–3 days for the topcoat to fully cure.
That cure time is what makes the difference between a rock-solid floor coating and one that starts peeling in six months. We always remind customers not to rush this step—especially when they’re replacing a failed epoxy coating or tired garage floor paint.
What About Rusty Drains or Weird Repairs?
During our initial site check, we’ll look out for things like rusty drains or unusual floor slopes. If we notice something like a corroded drain, we’re prepared. Sometimes we just swap out the cover. Other times, we need to cut around the drain and install a new one entirely.
Either way, we can usually finish the whole garage in the same day. It’s one of those things we plan for so you don’t end up surprised—and one more reason professional garage floor coating systems are worth it.
Other Things to Expect: Noise, Dust, and Communication
Grinding concrete isn’t a quiet job. We always let homeowners know that the first few hours will be loud. One customer told us afterward they appreciated the heads-up: she worked from home and just set up her laptop in the basement for the day where it was quieter.
Once we’re past the prep stage, the rest of the install is much quieter. And yes, we vacuum the driveway before we leave. It’s just part of leaving the space better than we found it. We treat your garage like it’s part of your home—not just a place to park the car.
Why Polyurea Garage Floor Coatings Are Worth It
Most people don’t think about their garage floor until it starts flaking, cracking, or staining. But it’s one of the most used spaces in the house!
A proper coating protects against moisture, chemicals, and ugly stains. It also looks great. Whether you’re sick of floor paint peeling every spring or you’re just tired of sweeping up dust from bare concrete, a polyurea garage floor coating is one of the smartest long-term upgrades you can make.
We’ve seen folks try everything, from epoxy kits from home improvement stores to interlocking floor tiles…and end up calling us a year later. A patchy paint job or second coat isn’t going to fix a failing surface.
Our process works, it lasts, and we do it right the first time, with no shortcuts.
Looking for a garage floor coating that’s easy to clean, tough enough for your truck, resistant to hot tire pickup, and still looks sharp? Let us handle it—from prep to finish.
Your garage deserves better than a peeling coat of paint. Give us a call for a free quote!
Why Polyurea and Polyaspartic Coatings Outperform Epoxy Floor Coatings
For decades, epoxy floor coatings were the go-to solution for garage floor paint and concrete protection. But materials have come a long way, and polyurea and polyaspartic coatings are leading the charge. Compared to traditional epoxy coating systems, polyurea and polyaspartic offer a much faster cure time, higher UV resistance, and longer-lasting durability.
One of the biggest complaints with epoxy garage floor paint is peeling, especially in areas with hot tire pickup or seasonal moisture. Epoxy coatings are also more brittle, making them prone to cracking and delamination as the concrete expands and contracts. Polyurea, on the other hand, is flexible: it moves with the surface instead of fighting it.
Polyaspartic topcoats are also far more chemical-resistant and better suited to temperature swings, oil spills, and day-to-day garage traffic. Where epoxy floor paint may need touch ups or a second coat within a couple of years, polyurea-based floor coating systems often last 15+ years with minimal maintenance.
If you’ve been burned by a DIY epoxy floor paint kit or a discount garage floor coating service using outdated materials, polyurea and polyaspartic are the upgrade you’re looking for. They’re not just more durable, they actually look better too, with glossier finishes and a wider range of color options thanks to full broadcast decorative chips. In short: epoxy coatings had their time. But if you want a concrete floor that’s ready for real-world use—moisture, chemicals, car tires, and all—polyurea and polyaspartic are the best coatings available today.